
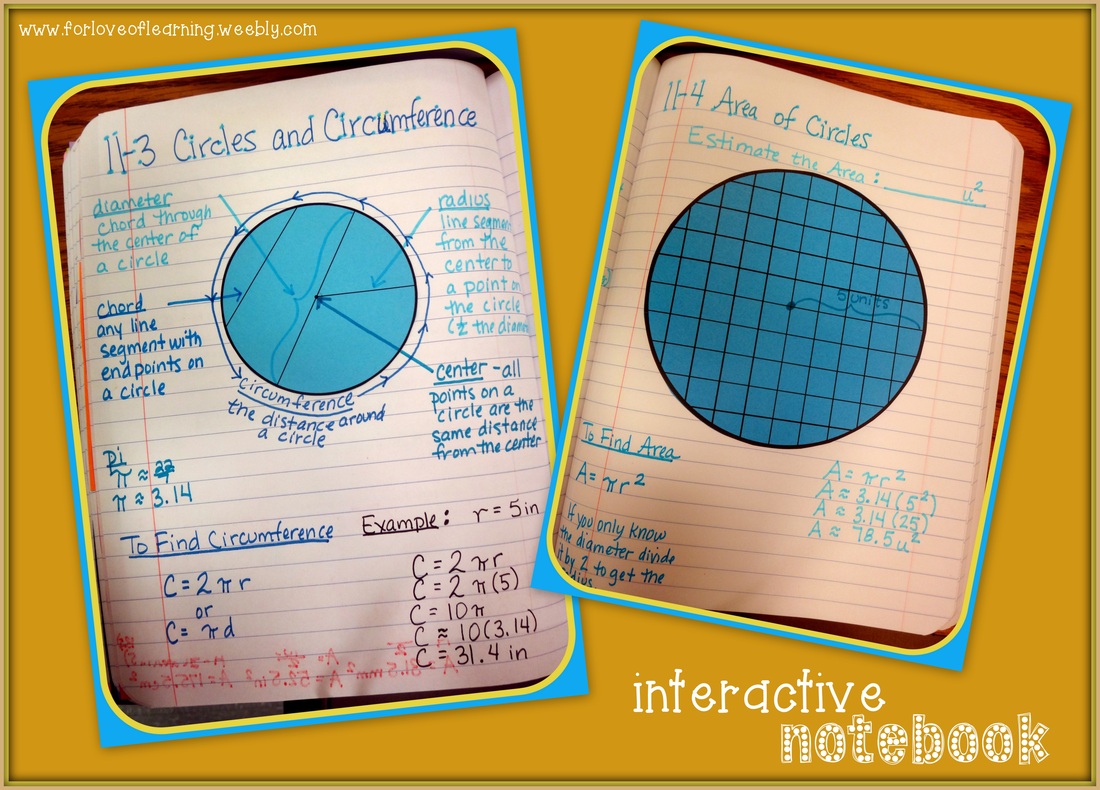
These are a couple of the interactive notebook pages my class used when we were studying measurement of circles. Students so often get mixed up about the formulas for circumference and area. I think having the notebooks as a reference this year helped them. For the area page the students used the grids on the circle to estimate. (The radius wasn't labeled on the circle yet because I didn't want those who knew the formula to use it at this point.) They counted units squared and the estimation really came in when they had to combine the partial squares to come up with the whole area. The students shared their estimates with the class. Next they had to determine the radius and label it on the circle. We used the formula to calculate the area of the circle and talked about who had come the closest with their estimate.
To create the circle with the grid:
To create the circle with the grid:
- Inserted an image of a grid in a Word document then clicked on it to format the picture.
- In the Picture Styles I chose the oval.
- To make it a circle, I changed the size so that the height and width were equal. You may need to change the aspect ratio. Click the little arrow button next to the height and width to open the menu for Layout. Go to the Size tab. Uncheck the box that says "lock aspect ratio." Then you should be able to fix the height and width to the same size.
- If your picture has a shadow underneath it you could leave it there if your students are cutting out the circle anyway. I removed it from mine by clicking on Picture Effects and on the Shadow option I selected No Shadow.
- I copied and pasted the picture as many times as would fit on one page to save copies and printed them on colored paper to make the activity stand out in the notebook.


 RSS Feed

